
Guide to Daily Inspection and Quick Replacement of High-Elastic Buffer Bars in Guide Chute Under Harsh Copper Mine Conditions
Copper mines operate under harsh conditions. The heavy impact of abrasive ore at transfer points causes severe conveyor belt damage, leading to high downtime losses and frequent maintenance.As the first line of defense, high-elastic buffer bars inside guide chute effectively absorb impact energy and protect belts, yet they wear extremely fast in copper mine environments.This guide provides practical daily inspection and quick replacement procedures to help minimize downtime and reduce operating costs.
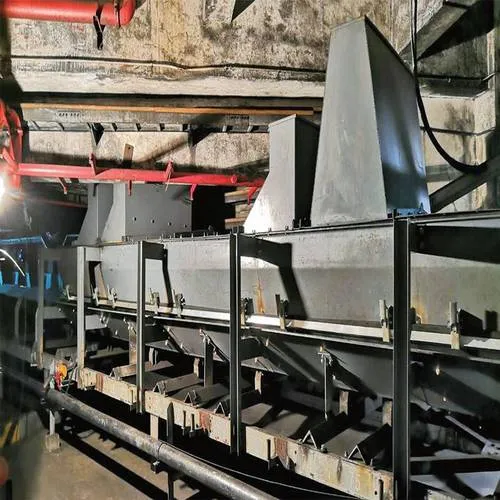
A.Daily Inspection: Identify Wear Before Failure
Inspection Checklist Details
·Check elastic layer condition: Inspect the rubber buffer layer for aging, cracking or permanent compression deformation. A damaged elastic layer loses its shock absorption capacity, causing impact forces to transfer directly to the belt.
·Verify fastener tightness: Inspect self-locking nylon lock bolts. Under intense vibration, bolts may loosen over time. Ensure all bolts are tightened and the buffer bars fit fully against the guide chute support frame.
·Monitor material flow: Check for material buildup or spillage between buffer bars. Excessive clearance can cause copper ore jamming, which accelerates wear and may lead to belt misalignment.
B.Preparations for Rapid Replacement
Pre-Work Preparation Items
·Carry out Lockout/Tagout (LOTO) procedures: Strictly follow LOTO safety standards. Cut off power to the conveyor and lock the working area before commencing any maintenance.
· Pre-assemble buffer bars: When feasible, mount new buffer bars onto the sub-frame on the ground prior to lifting them into the guide chute. This greatly cuts down working time for staff inside the guide chute space.
·Prepare dedicated tools: Have torque wrenches, impact drivers and special fastener tools matching your buffer bed system on hand.
C.Step-by-Step Quick Replacement Process
Operating Steps
• Step 1: Remove old buffer bars
Unscrew bolts of worn buffer bars. If bolts get rusted tight due to dust and moisture, apply penetrating anti-rust oil. Take out old bars gently to avoid damaging the support frame underneath.
• Step 2: Clean the mounting surface
Thoroughly clean the support frame to remove all copper mine dust, debris and residual rubber. A flat and clean mounting surface enables full contact of new buffer bars and avoids abnormal wear caused by uneven stress.
• Step 3: Install new high-elastic buffer bars
Place pre-assembled buffer bars into the guide chute and align them carefully to eliminate gaps between adjacent bars.
• Step 4: Fasten and apply specified torque
Secure buffer bars with supporting self-locking nylon bolts. Tighten bolts per the manufacturer’s torque specifications to prevent loosening during operation.
• Step 5: Final alignment inspection
Make sure the top surfaces of new buffer bars form a smooth, continuous plane matching the contour of the conveyor belt. This prevents belt misalignment and delivers optimal shock absorption performance.
D.Practical Recommendations for Copper Mine Environments
Optimization Solutions
·Select appropriate material grade: Choose high-elasticity and wear-resistant buffer bars tailored for copper mine working conditions. If the mine has flammable dust or special safety requirements, ensure the buffer bars are anti-static and flame-retardant.
·Adopt intelligent monitoring: For large-scale mines, install wear monitoring sensors on guide chute liners and buffer beds. Real-time data will trigger alerts before wear reaches critical levels, converting emergency repairs into planned maintenance.
·Standardize spare parts: Maintain standardized stock of buffer bars and fasteners on site. Using uniform spare part specifications across multiple transfer points simplifies replacement procedures and cuts inventory costs.
Summary & Inquiry
·Maintenance Value Note:Proper maintenance of buffer strips is far more than part replacement—it protects your core asset, the conveyor belt. Standard inspection procedures and quick-change solutions help copper mine operators extend belt service life, reduce material spillage and maximize plant operational efficiency.
·Product Inquiry Channel:Looking for high-performance buffer strips customized for harsh copper mine working conditions? Contact our engineering team right away to get tailor-made guide chute protection solutions.
Related News
- Why do conveyor idler brackets fracture easily in heavy-duty mining areas?
- What is carryback? How to eliminate it?
- How to Stop Belt Edge Wear Against Conveyor Frame
- Does Pulley Material Buildup Reduce Conveyor Efficiency?
- How to Keep Mine Conveyors Running Safely Through the Rainy Season?
- How to Select Conveyor Frame Materials for Humid Environments?
Leave me a message